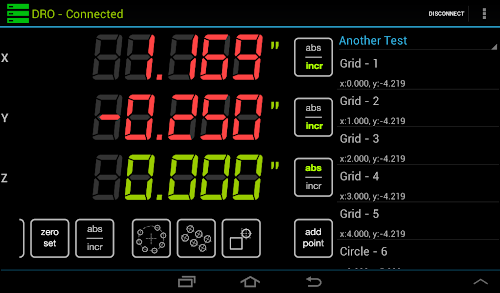
When I released last version of the Touch DRO application early this year my plan was to have a new version out by April. This, obviously, hasn’t happened due to a number of reasons, including a busy work schedule, a never ending list of things to do around the house etc. On top of that, from the received feedback, I realized that I had to make the “guts” of the DRO application much more robust before the new features can be added. Now, after a fairly major overhaul, the application is getting ready for the release and includes some of the lacking functions.
This version of the DRO is optimized to be used on a milling machines with three or four linear scales but with a few minor tweaks can be adapted to a lathe. Some functions, such as tool offset, will work identically on a lathe DRO.
Hole Circle Function
As the name suggest, this function can be used to mill or drill a set of holes along an arch or a circle. In the most basic case you can specify the radius and the number of holes. The app will do the math add the points centered on the current spindle position and add them to the list. For more complex setups the app provides a way to set an arbitrary center position and rotate the pattern. Finally, by setting the “theta” angle to less than 360 degrees the DRO will create an arch rather than a circle.
 |
| This setup will create 8 holes along a 180 degree arch rotated 45 degrees from vertical |
Tip: this function can be used to cut a radius by specifying a sufficiently large number of holes.
Hole Grid Function
The “Hole Grid” function is used to mill or drill a series of equally spaced holes. The setup is pretty simple: enter the step (distance between holes) and repeat (number of holes) values for the desired axes, set the angle and the DRO will add the coordinates to the points list. For example, to define a 3x4 grid of holes spaced by 1” along mill's X axis and 1.5” along Y axis, the setup would be as shown in the screenshot below.
 |
| The dialog is ready to create a 3 x 4 hole pattern |
Similarly, let’s say you need to mill two holes 4” apart at 30 angle. If you have a scientific calculator handy and remember your trigonometry, the formula is very simple: x = 4 * sin(30), y = 4 * cos(30). Alternatively, using the “Hole Grid” function as show below achieves the same result.
 |
| Hole Pattern function can be used to drill a line of holes at an angle |
Tool Offset Function
This is a fairly basic function that can be used to [quite obviously] set the tool offset or locate the edge with an edge finder or a wiggler. To set the tool offset simply enter the tool diameter and select the direction of the offset in X and/or Y axes using one of the dropdowns.
 |
| The application lets you enter tool offset for one or two axes at once |
When the offset is set on an axis the readout will turn orange. To remove the offsets simply press and hold the offset button for a second or so.
 |
| Axes that have tool offset enabled change color to orange |
Since a DRO can be set up to have the (0,0) point in any of the corners, the offsets are not “left” or “right” but rather “positive” or “negative”. If your milling machine is set with 0,0 in the lower left corner of the table, “negative” will offset the tool left and toward the front for X and Y respectively and vice versa.
Multiple Workspaces
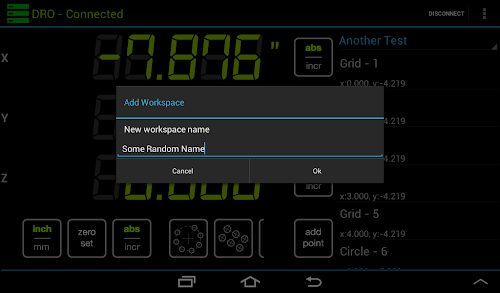
When you add a point to memory, either via “Add Point” button or using one of the above functions, the point is inserted into the currently selected workspace. Over time the workspace can become pretty cluttered. In the previous version you’d simply delete the points (by swiping them off the screen). This works OK for one-of pieces, but sometimes it’s useful to keep the pattern for later use. For such cases then new version now lets you create a new blank workspace and keep the old one for as long as you wish.
 |
| To add a new workspace, bring up the "Workspace Commands" menu and select the "Create Workspace" option |
 |
| In the next screen enter the desired name and click "OK" |
To add a new workspace simply touch and hold [for a second or so] the workspace drop down in the upper-right corner of the screen. Once the “Workspace Commands” dialog appears, click “Create Workspace” button, enter the desired name in the next dialog and click OK.
Workspace Preview
This “feature” started as a debugging aid. When I first started working on the hole pattern functions, to test the outcome I had to run to the garage, put a piece of paper on the mill, locate the point, and (using a marker mounted in the chuck) put a dot on it. It got a bit old in a hurry so one evening I decided to add a simple “preview” screen. Over time I found it pretty useful for double-checking that I have the correct point selected, etc.
Workspace preview is accessible through the same “Workspace Commands” menu by clicking “Preview Workspace” button. The screen will display the point in the current workspace as crossed circles, the location of the current incremental “Zero” and current readout as green crosshairs. For example, the screenshot below displays the points that I created while demonstrating the other functions.
 |
| Workspace preview can be useful for verifying the patterns |
In this version the screen isn’t interactive but in future I am planning to add a way to select points and some other functionality.
Conclusion
These are just some of the changes that are coming up in the new version. I hope these new functions [once release] will make the DRO a bit more convenient to use, at least on a milling machine. At this point I’m planning to publish the new version to the Android Market by the end of next week (or earlier). The functions are done and mostly tested but before letting the app loose I want to do a bit more testing. If you want to give it a try before the “official release”, please feel free to grab the nightly build form the Downloads section.
Hi Yuriy ,
ReplyDeleteI would like to get the link to the new dro apk file .
Thanks Bob
Hi Yuriy,
ReplyDeleteI'd like to try out the preview .apk please.
I have a setup with 3 iGaging scales working to an Arduino using your code. Instead of bluetooth I used a max232 and have a plain RS232 output. I also have a nexus 7 working with a usb-serial adapter via USB OTG cable.
I have been intending to try to adapt your Android DRO code to work with a direct serial port connection for many months now, but haven't made time yet.
I might make some time this weekend to look into it. If it's something you could add easily I'd greatly appreciate it!
Hi,
DeleteI am trying to get USB support into this version but that has about 80/20 chance right now.
The APK is located at http://files.yuriystoys.com/dro/TouchDROHD_0.3.0.apk. There is one issue in this version, though: the dialogs appear too narrow. On a tablet everything should work fine, though.
Thank you
Yuriy
Awesome. These are great tools. This will make it easier to drill oval holes to better fit the Bowlers thumbs. Please keep up the Outstanding work, but do make time for the Family.
ReplyDeleteMany, Many thanks
Frank
Hi Yuriy ,
ReplyDeleteI like it on my 10 inch tablet the axis's are a little smaller
nothing you can't live but like to other features question is the a way to make the w axis work for a quill scale .
Again your over the top with this thanks .
Bob
Yuriy, the Tool Offset feature is cut in half on my "cheap" 7" Coby. This is not a problem for me but might be for others. Still a very awesome program.
ReplyDeleteThanks
Frank
Frank,
DeleteIs it just the tool offset or all three function dialogs (hole circle and hole grid)?
I've seen this behavior on some phones (where the dialog didn't detect the screen width correctly) but haven't seen it on a tablet. If possible, can you send me a screenshot of what it looks like?
Thank you
Yuriy
Attached is a picture of the DRO screen on my cheap Coby 7"tablet.The default workspace is larger than on the 10" Galaxy. But, I did find out that the tool bar isn't really missing. It's hidden and I can scroll left or right to expose the Tool Offset.
ReplyDeleteThank you
Frank
Great tool! Thank you for making it available. That said, would you consider offering a more 'normal (non-proportional) font for the numbers? You are matching the classic DRO interface but those were made that way because they had no choice. The segmented numbers are (IMHO) harder to read than continuous fonts, especially at a glance.
ReplyDeleteI'll add a setting to the next version. It's easy enough...
DeleteThank you
Yuriy
While you are making changes, would it be possible to get a display in fractions? Like 31/32 for 0.968. Awsome project, awaiting parts to build the voltage shifter.
Delete